Design Gallery
Basic Digital Painting
Digital Drawing and Painting
by
-

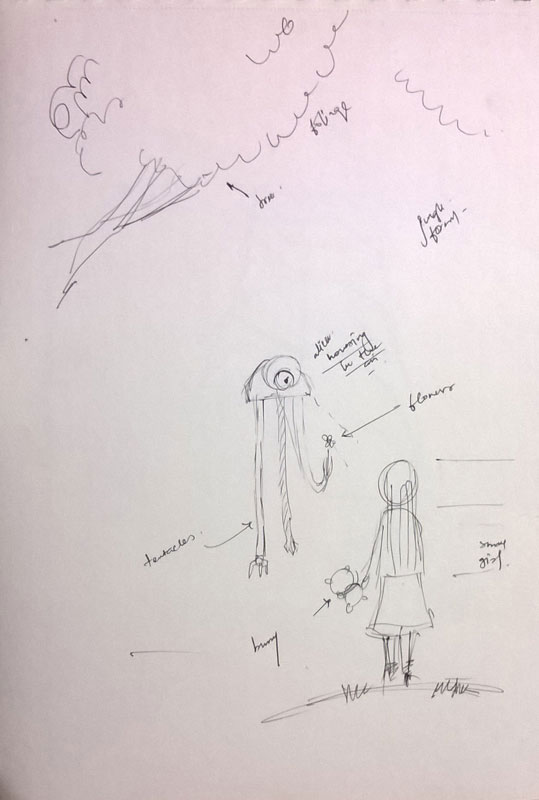
Sketch.
-

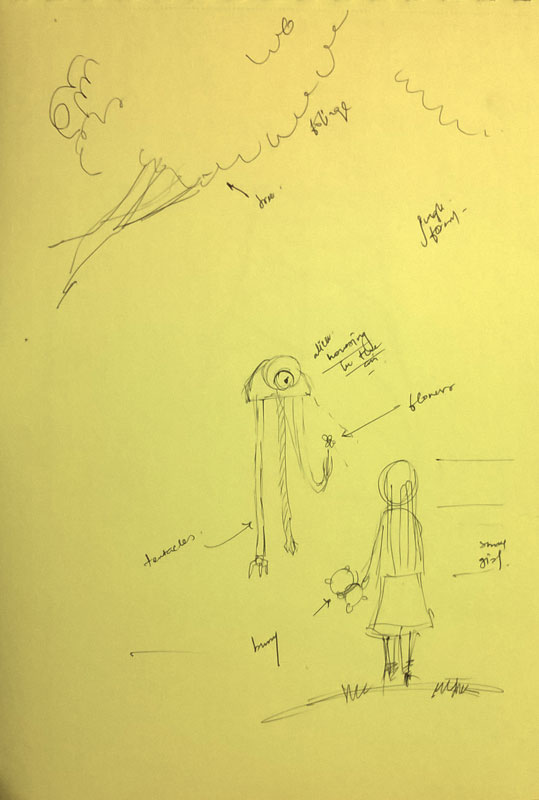
Yellow tone.
-

Establishing the basic color.
-

Strokes: Use of the basic Round Brush A basic round brush in Photoshop can be used to draw and paint almost everything in a digital painting. Below steps show how to use a basic round brush. • Selecting a basic round brush and lowering its opacity and varying the hardness gives complete control of the brush just like a traditional brush or pencil. • A basic brush with low opacity can be used to create gradient and fill colors with more control. Varying the no of stokes over a certain area produces gradient.
-

Create a teddy (a single layer exercise): • Create the simple silhouette using a basic brush with opacity 100% and a particular color. Here the color is pink. • Now selecting a less opaque brush (opacity 30-40%) with a brighter tone of the same color, paint the areas where light is more assumed to fall. • Now with a darker tone and same opacity paint the darker areas. • Black and white color can also be used to darken or highlight certain areas. above white color is used to highlight the more lit portion. • Start adding features to the teddy. • Detail the teddy as required. We can add stitches, buttons and even furs. • The last step and one of the necessary advantages of digital painting is the ability to color correct and do various adjustment to the painting.
-

Custom Brush Part 1: Apart from just a basic brush, custom brushes can also be created to work on foliage or more complicate repeating random patterns. A more step by step process is described below. Part 1: click and draw • Draw a single leaf with a darker color (black) over white background and select it using a selection tool. • Click on " Edit>Define Brush Preset" and name it 'leaf'(or 'cheese', 'burger' if you are hungry!) • Now with each click of the mouse, the selected leaf is created on the layer. • Using different tones of green to the same brush, now we can create a bunch of the same type of leaves as shown.
-

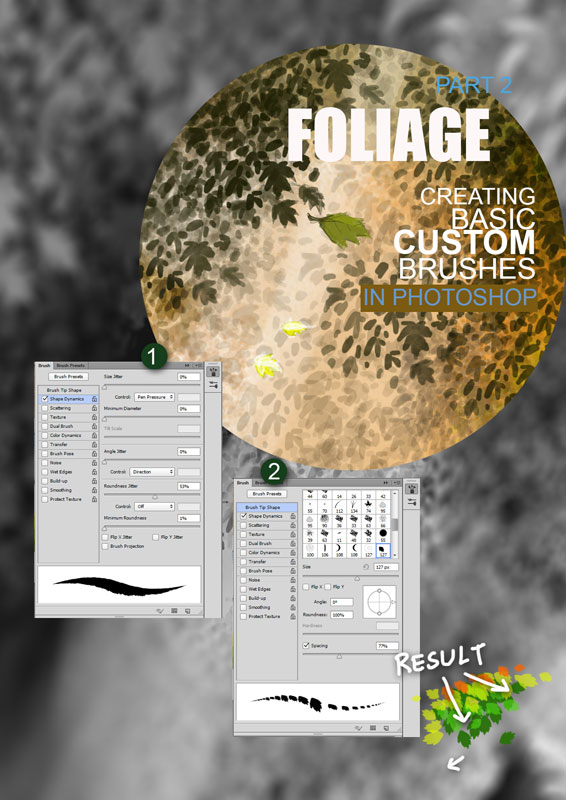
Custom Brush Part 2: The shape of the brush can be altered to act dynamically according to pen pressure or even direction. Just drag the brush with the following settings to achieve the desired effect.
-

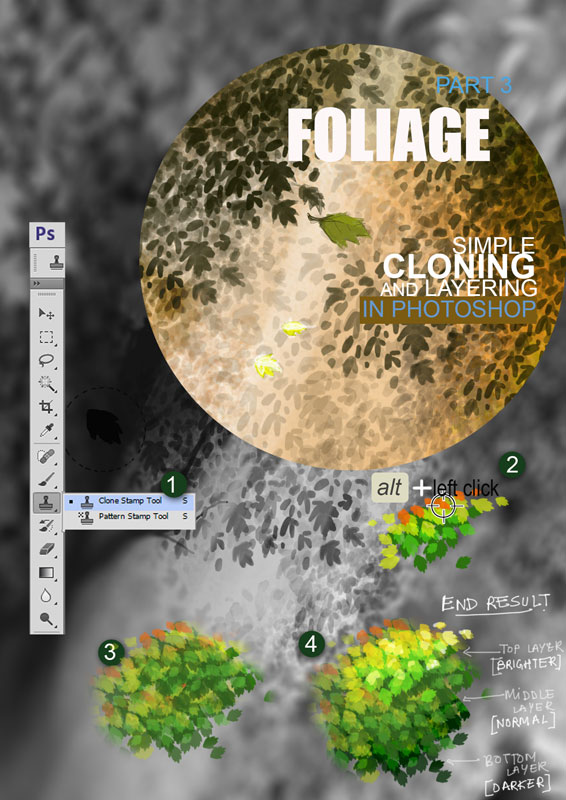
Cloning: Cloning is another way to achieve pattern in quick and easy way. The above examples show how to achieve the different layers of foliage.
-

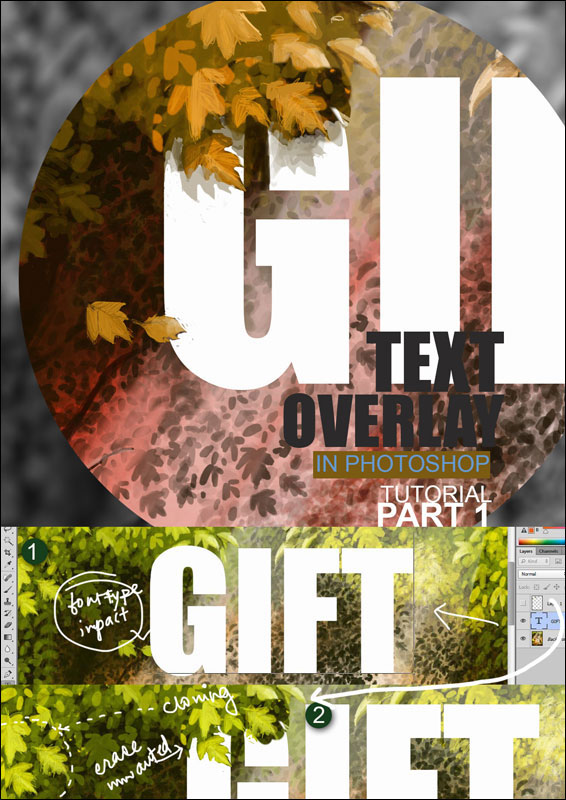
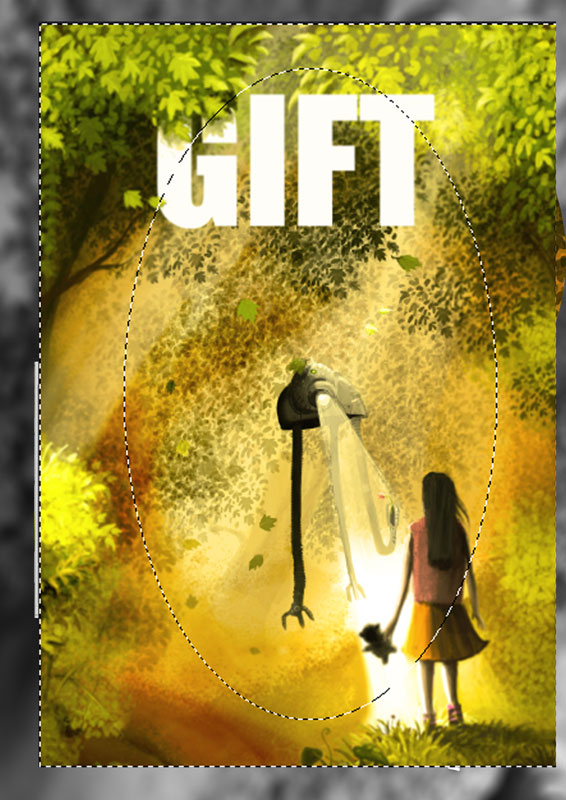
Text overlay effect.
-

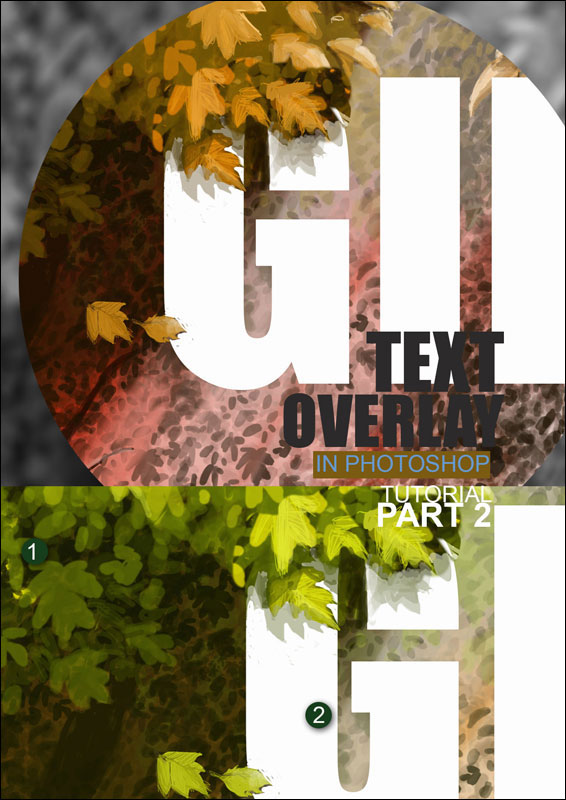
Text overlay effect.
-

Blur for depth.
-

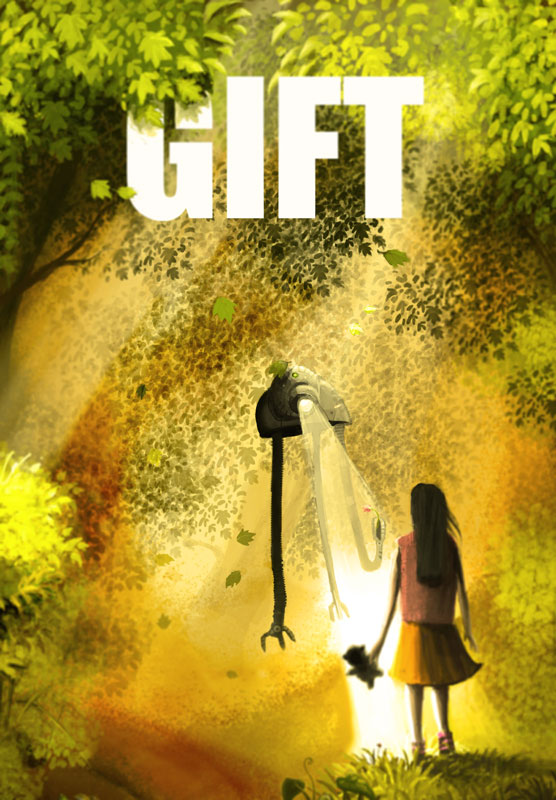
Final Image.


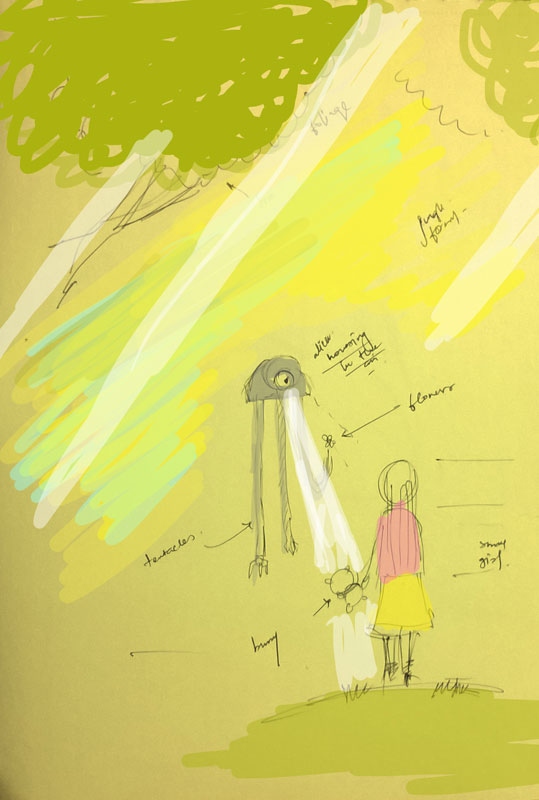
Just like traditional painting, digital drawing & painting also require good drawing skills and expertise. It also requires the knowledge of certain digital tool-sets and software’s. This tutorial covers some of the basic tips how few parts of a complicate looking digital painting (shown above) can be acquired by just playing around with few strokes and tools.
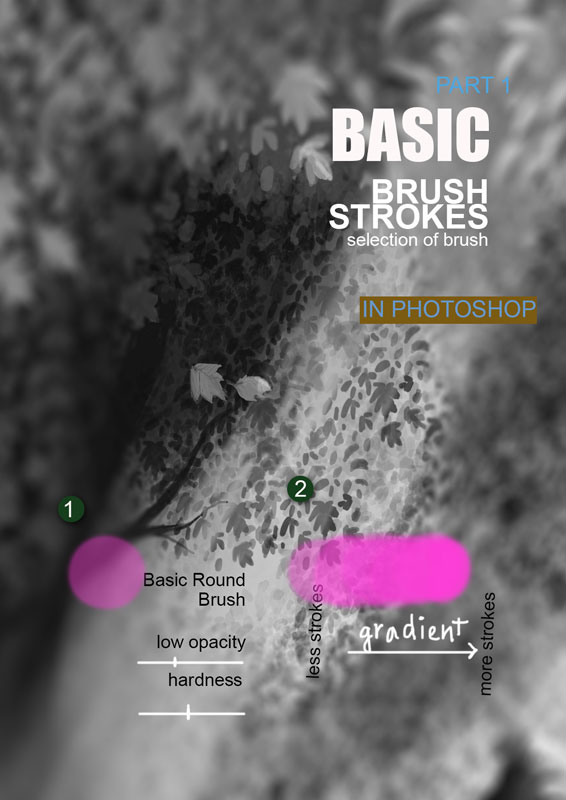
Strokes: Use of the basic Round Brush A basic round brush in Photoshop can be used to draw and paint almost everything in a digital painting. Below steps show how to use a basic round brush. • Selecting a basic round brush and lowering its opacity and varying the hardness gives complete control of the brush just like a traditional brush or pencil. • A basic brush with low opacity can be used to create gradient and fill colors with more control. Varying the no of stokes over a certain area produces gradient.
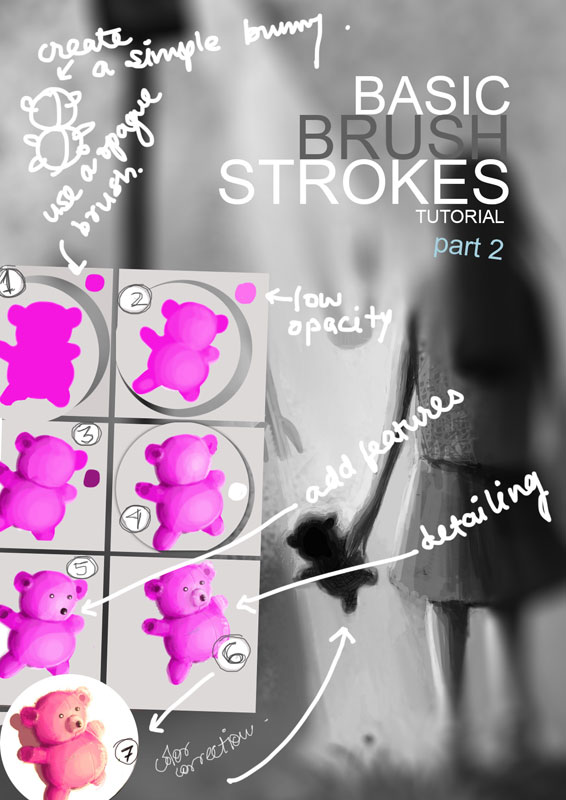
Create a teddy (a single layer exercise): • Create the simple silhouette using a basic brush with opacity 100% and a particular color. Here the color is pink. • Now selecting a less opaque brush (opacity 30-40%) with a brighter tone of the same color, paint the areas where light is more assumed to fall. • Now with a darker tone and same opacity paint the darker areas. • Black and white color can also be used to darken or highlight certain areas. above white color is used to highlight the more lit portion. • Start adding features to the teddy. • Detail the teddy as required. We can add stitches, buttons and even furs. • The last step and one of the necessary advantages of digital painting is the ability to color correct and do various adjustment to the painting.
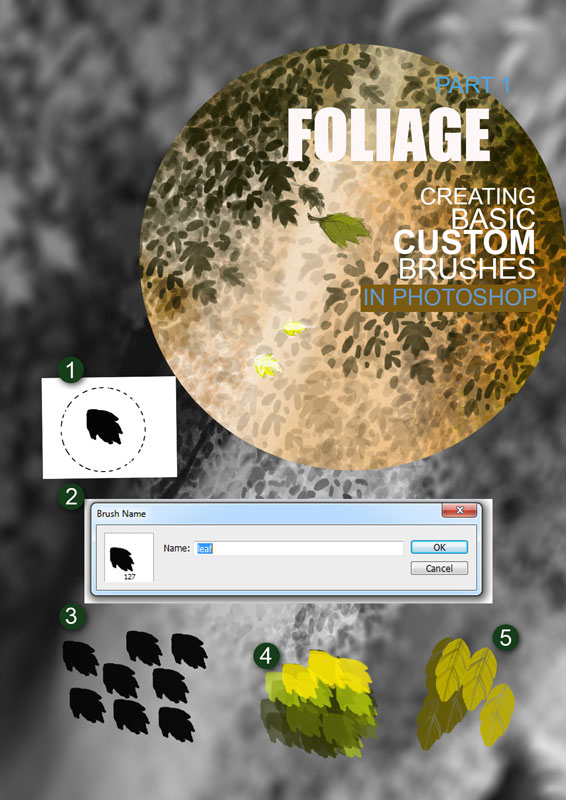
Custom Brush Part 1: Apart from just a basic brush, custom brushes can also be created to work on foliage or more complicate repeating random patterns. A more step by step process is described below. Part 1: click and draw • Draw a single leaf with a darker color (black) over white background and select it using a selection tool. • Click on " Edit>Define Brush Preset" and name it 'leaf'(or 'cheese', 'burger' if you are hungry!) • Now with each click of the mouse, the selected leaf is created on the layer. • Using different tones of green to the same brush, now we can create a bunch of the same type of leaves as shown.